|
|
|
|
|||||||||||||||
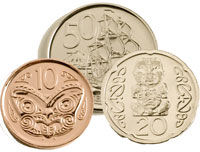
50 cents
|
Design: The bark Endeavour, commanded by Captain Cook, sailing south, with Mt. Taranaki (Egmont) in the distance. |
20 cents
|
Before December 1990 Design: A kiwi facing right and fern bush.
1991 onwards Design: A representation of a well-known Maori pukaki carving. |
10 cents
|
Design: A Maori carved head or koruru with Maori rafter patterns. |
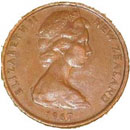
5 cents
|
Design: A tuatara sitting on a coastal rock. A gull flies in the background. |
$1.00
|
Design: A kiwi with fern leaves. |
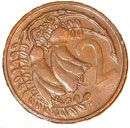
$2.00
|
Design: A kotuku (white heron), flying right. |
There are two designs for the 20 cent coin because New Zealand developed two new coins - the $1 coin and $2 coin - in 1990. It was decided to feature the kiwi on the $1 coins (so we truly have a kiwi dollar), so the kiwi was removed from the 20 cent coin.
In 2006 we do not need any new pictures for our coins as we are just changing their size and composition.
Have your students complete a rubbing of the images on the current and new coins by holding a coin steady under the paper and using a soft pencil to stroke over the page.
Ask the students to work as groups or individuals and design a new coin. Before they design their coins the students might want to explore:
what makes a good image for a coin, by looking at coins from other countries. Students may be able to bring foreign coins from home along to discuss
what New Zealand image they would use and why.
It is suggested that you use this activity as an extension after your students have designed their coins, as many of the ideas the students come up with may already be on our commemorative coins. However, some students may be aware of the commemorative coins and bring them into their discussions about coin design.
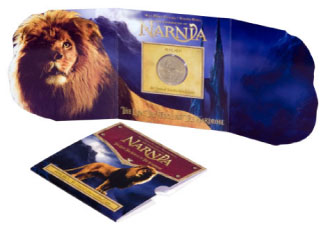
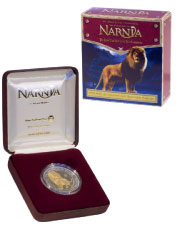
Ask the students if New Zealand has produced coins with images from Lord of the Rings, or Narnia, or of Hector's dolphin on them.
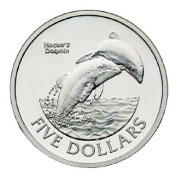
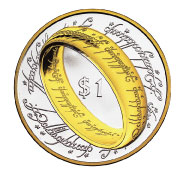
Explain that New Zealand develops special sets of coins for coin collectors. Limited numbers of these coins are produced and their value might increase with time. We have made commemorative coins to recognise the New Zealand films Narnia and Lord of the Rings as well as coins to recognise special New Zealand animals like Hector's dolphin and special events in New Zealand's history.
Students can look at the commemorative coins New Zealand has produced by visiting http://stamps.nzpost.co.nz/Cultures/en-NZ/Coins
The coins are 'legal tender' and you could use them to buy goods but people don’t usually do this. Instead people make a hobby or a business out of buying and selling commemorative coins.
Students who are interested in finding out more about buying and selling coins on the internet could visit Trade Me or eBay or other websites that provide information about collecting coins.
Students could:
discuss what events, or other things, would make uniquely New Zealand commemorative coins
decide who they would feature, and why, if a series of coins was to be made featuring famous New Zealanders young people look up to
decide what, or who, they would feature on a series of coins made to feature young people in New Zealand and their achievements.
Tell the students that people in New Zealand can now have stamps made with their own photograph on them. Students can find out about this on http://stamps.nzpost.co.nz/Cultures/en-NZ/Stamps and entering personalised stamps in the search option.
If the students could make a coin that was special to their whanau, school or community have the students decide what they would put on it and why.
![]()
In this outdoor activity pairs of students toss a coin to see which of two activities they will do. It requires some preparation of cards for activity stations outlining two alternative activities such as:
heads - star jumps, tails - hopping.
heads - throw and catch a small ball, tails - throw and catch a large ball.
heads - skipping with a skipping rope, tails - skipping using a hoop.
The activity is designed with an optional classroom bar graphing extension activity.
The P.E. activity
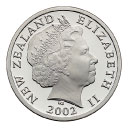
Provide enough small coins for each pair of students to have a coin. It is recommended you use real coins for the activity, but if you use a plastic coin remind the students this coin does not have the Queen’s portrait on the head side.
Set up your chosen range of activity stations with explanation cards that show two possible activities, one marked heads, one marked tails.
Have the students move through the stations at suitable time intervals and complete an even number of activities.
At the start of each activity have the students toss their coin and record whether they tossed a head or a tail. Then have the student complete the activity indicated by the result of the coin toss.
In the classroom
Students could record their own and the classes' results.
Explain that there is an equal probability of a coin that is tossed landing on the head or the tail side. So in 10 tosses the theory says you should have five heads and five tails, but this does not always happen in practice.
Discuss how close each pair (and the class) was to the predicted ratio of equal number of 'heads' to equal number of 'tails'.
![]()
![]()
Hosted by:
![]()
![]()